https://grasswiki.osgeo.org/wiki/File:CleanTOPO2_map.png
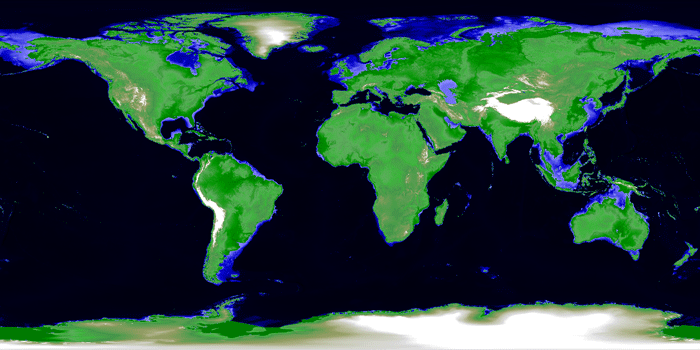
この簡易画像を次に示す。
GEでポリゴン(ベクトル)を作成し,Grassの世界全域の経緯度座標系に取り込んでも,地形などの背景がないと,地球上の位置関係がわからない。わざわざ多大の労力を払って,GE表示から離れる意味はない。そこでどうしても世界地図が必要となる。
乗りかかった船である。今,本当に忙しくて,こんなことをしている場合ではない。しかし,2018年度秋学期の研究法の授業で新たに始めてしまったことなので,一応の完結をみなければならない。GISが世界地図を扱えないという誤解もある。それを払拭しなければならない。この作業をしてみて,今更ながらわかったのであるが,數十キロメートルのようなサイズの地物featureを扱っても意味がない。最低,数百キロメートルの地物の分布を論じる時に意味が出てくる。數十キロ以下ならば,地方図を用意する必要がある。ここでの興味の対象は,世界地図規模の地物の分布である。例えば,世界気候図だとか,世界都市分布図などである。
このページには,大きく二つのテーマがある。一つは,高度DEM, もう一つは,レリーフマップである。高度DEMはCleanTOPO2を,レリーフマップはNatural Earthを採用した。
Grass-WikiのGlobal datasets https://grasswiki.osgeo.org/wiki/Global_datasets
には優れた世界高度DEMが公開されている。 このうち,地表の陸域だけでなく,海底地形も表現されている次のものを採用した。 CleanTOPO2 (DEM)
Edited SRTM30 Plus World Elevation Data である。ここには,Grassでの利用法が次のように示されている。
Import in GRASS: r.in.gdal CleanTOPO2.tif out=cleanTOPO2.tmp -l -o
g.region rast=cleanTOPO2 -p -g
# rescale from odd integer values to true world values
r.rescale cleanTOPO2.tmp out=cleanTOPO2 to=-10701,8248
r.colors cleanTOPO2_final col=terrain
これを実行してみたが,当方の使用目的からすると,意味がないことがわかった。興味がある方は実行してください。
上記サイトで,CleanTOPO2 download,のリンクを開くと,次のページが現れる。
CleanTOPO2
Edited SRTM30 Plus World Elevation Data Data — hosted by Florida State University, FREAC
http://www.shadedrelief.com/cleantopo2/
にファイルがリストされているが,目的に応じたdownsampledファイルではなくて,フルバージョンを使用する。
CleanTOPO2 comes in three versions tailored to meet different design and production needs. All versions are 16-bit grayscale TIF files measuring 10,800 x 5,400-pixels and include a World (.tfw) file and "Read me" document with projection and datum information. The Geographic projection is used. All data available here are in the public domain.
CleanTOPO2 (68.8MB) - Full resolution terrestrial and bathymetric elevation data. Note: the terrestrial data in this version may be too detailed for some small-scale mapping.
The Geographic projection is used.
だから, http://spatialreference.org/ref/epsg/wgs-84/
で,EPSG:4326である。つまり,次のようである。
WGS84 Bounds: -180.0000, -90.0000, 180.0000, 90.0000
Projected Bounds: -180.0000, -90.0000, 180.0000, 90.0000
Scope: Horizontal component of 3D system. Used by the GPS satellite navigation system and for NATO military geodetic surveying.
Last Revised: Aug. 27, 2007
Area: World
Proj4表現では, +proj=longlat +ellps=WGS84 +datum=WGS84 +no_defs
Fullバージョンをダウンロードすると,
CleanTOPO2.tfw
CleanTOPO2.tif
Data_info.txt
が入っていて,
Data_info.txtの中は,
Projection: Plate Carree aka Geographic or "LatLong"
Earth ellipsoid: Sphere, radius 6370997 m
Datum: WGS84
Extent: 180 West to 180 East, 90 North to 90 South
Size: 10,800 height samples wide x 5,400 high
Resolution: 2-arc minute (about 3.7 km/degree)
Elevation range: -10,701m to 8,248m
とある。
CleanTOPO2.tfwは,
0.03333333333333
0.00000000000000
0.00000000000000
-0.03333333333333
-180.00000000000000
90.00000000000000
である。この意味は,
1 pixelのx方向の長さ
行の回転パラメータ
列の回転パラメータ
1 pixelのy方向の長さ
左上ピクセルの中心位置のx座標
左上ピクセルの中心位置のy座標
world fileが入っているので,Geotiffへの変換をした。
CleanTOPO2.tifは 116.7MBである。Adobe PSで見る事ができる。で,Geotiffに変換する必要があると思うよね。実際,ワールドファイルのCleanTOPO2.tfwファイルが入っている,\worldmapフォルダーに用意されていたCleanTOPO2.tfwを入れて,OSGeo4W内のOSGeo4W Shellで,下記のように,実行できた。
gdal_translate -of GTiff "\\.psf\.mac\Users\moto\grassdata\FileConvert_folder\worldmap\CleanTOPO2.tif" "\\.psf\.mac\Users\moto\grassdata\FileConvert_folder\worldmap\CleanTOPO2_gtif.tif"
このパス指定はmac上のParallels Desktop内のWindows XPに入れているGrass6.4の実行を反映している。
上記のように,geotiff化できたことが,私を混乱させて,半日近く無駄にした。何と,CleanTOPO2.tifは,元々geotiffであった。だから,この場合,tfwファイルは必要無かったのである。明記して欲しかった。サイト作成者のミスであろう。
さて,Grassの世界経緯度座標系のLocationに取り込む過程を次に述べる。筆者はmac上のParallels DesktopにWindows XとXPを使っている。情報演習室にはGrass7がインストールされているので,Windows X環境のGrass 7を使うこととする。
画像としては次のものが提供されている。Grassに取り込んだ後のrasterの色表現で参考になるだろう。
https://grasswiki.osgeo.org/wiki/File:CleanTOPO2_map.png
この簡易画像を次に示す。

1. Windows 10, Grass7, で,CleanTOPO2_2nd.tifをcommandで実行する。
Windows 10ではマックとのパス表示が変わった。
\\.psf\.mac\Users\moto\grassdataの代わりに,
\\Mac\Home\grassdata\ または, Z:\grassdata
であるが,うまく行かないので,USBにCleanTOPO2_2nd.tifファイルを入れることにした。ぼくの場合,USBドライブはD:になっている。君たちは自分のドライブ名称を各l人してほしい。
r.in.gdal input=D:\CleanTOPO2_2nd.tif output=cleanTOPO2.tmp -l -o
木庭のmac上のWindows10でのコマンド実行作業では,実行経過は次のように表示される。
C:\Users\moto>r.in.gdal -l -o input=D:\CleanTOPO2_2nd.tif output=CleanTOPO2.tmp
x:
x:
Proceeding with import of 1 raster bands...
Importing raster map <CleanTOPO2.tmp>...
100%
C:\Users\moto>
取り込んだDEMを次に示す。断裁表現の工夫が必要ではある。
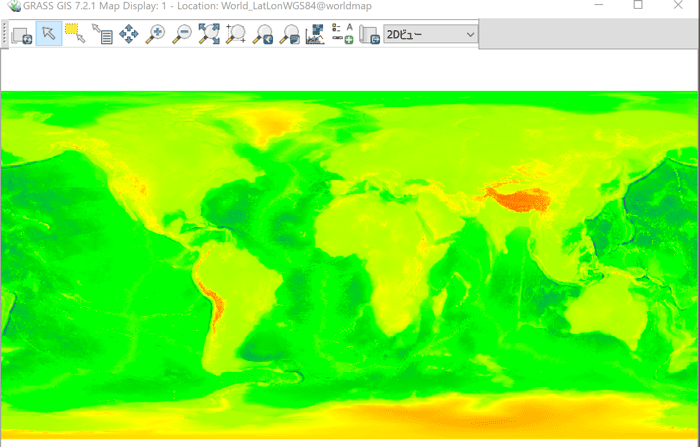
map displayの画面の右上の,2Dビューを,3D表示に切り変える。表示には時間がかかる。
Natural Earth
World physical map at 1.24 km resolution
https://www.naturalearthdata.com
このサイトはGISで世界地図を利用する上での最も優れたサイトのように思われる。
このページのはじめに述べたClearTOPO2はDEMではあるが,解像度が低く,3D表現しても,我々が知る地形表現を得ることができない。それならばもうDEMは使わずにRGB画像だけで十分という考え方が可能である。
Download Natural Earth
Data hosted by: Florida State University, FREAC
http://www.shadedrelief.com/natural/pages/download.html#anchor
これは同サイトのダウンロードページである。ClearTOPO2にドレープできるイメージデータなど種々のコンテンツが提供されている。ClearTOPO2に拘らずにより高い解像度を利用した方がいいと今は判断している。
この画像は,砂漠,サバナ,森林,高地,ツンドラ,氷河,に区分されており,レリーフが表現されている。
Full-resolution (1.24 km) data: RGB TIF image and World File, plate carrée projection, WGS84 datum, 16,200 x 16,200 pixels (per hemisphere)
Print the world 5.5 meters- (18 feet-) wide at 150 DPI
の画像のうち,
Landcover, shaded relief, waterの,
Western hemisphere (111MB)
Eastern hemisphere (181.4MB)
そして,
Extras: Grayscale TIF images, 16,200 x 16,200 pixels
のうち,
Water bodies:
Western hemisphere (5.6MB)
Eastern hemisphere (4.1MB)
MODIS urban (more suburbs):
Western hemisphere (628K)
Eastern hemisphere (956K)
参考: Nasa TERRAの,衛星写真MODIS
MODIS Moderate Resolution Imaging Spectroradiometer (NASA/EOS instrument)
https://terra.nasa.gov/about/terra-instruments/modis
をダウンロードして,Grassに取り込んでみよう。
ぼくはmacのParallels DesktopのWindows10にGrass7を入れている。で,なぜかmacとのパス指定がうまくいかないので,取り込むファイルはUSBドライブ(ぼくの場合D:)の\shade_reliefフォルダーに入れる。
さて,ワールドファイルは添付されているが,ClearTOPO2.tifと同様にgeotiffになっていると考えて作業を進めた。一見取り込めたように見えたが,座標値が無茶苦茶。西半球ファイルなのに,南北方向が東経,東西方向が北緯になっている。どうもGeotiffではなかったらしい。
で,改めて,Geotiff化の作業を実施することにする。ワールドファイルと同じフォルダーにあれば,勝手に読み込んでくれるはずで,shade_reliefフォルダーにtifもtfwもまとめて入れることにした。tifは次のよう。
Landcover, shaded relief, waterのWestern hemisphere (787.3MB)
D:\shade_relief\LC_SR_W_16200_W.tif
Landcover, shaded relief, waterのEastern hemisphere (787.3MB)
D:\shade_relief\LC_SR_W_16200_E.tif
Water bodies:Western hemisphere (262.5MB)
D:\shade_relief\HY_16200_W.tif
Water bodies:Eastern hemisphere (262.5MB)
D:\shade_relief\HY_16200_E.tif
MODIS urban (more suburbs):Western hemisphere (262.5MB)
D:\shade_relief\MU_16200_W.tif
MODIS urban (more suburbs):Eastern hemisphere (262.5MB)
D:\shade_relief\MU_16200_E.tif
で,geotiff化されたファイルは同じファイル名で,shade_relief_geoフォルダーに入れるようにする。そのコマンドが次のよう。
gdal_translate -of GTiff "D:\shade_relief\LC_SR_W_16200_W.tif" "D:\shade_relief_geo\LC_SR_W_16200_W.tif"
実行結果が次のようになる。
C:\Users\moto>gdal_translate -of GTiff "D:\shade_relief\LC_SR_W_16200_W.tif" "D:\shade_relief_geo\LC_SR_W_16200_W.tif"
Input file size is 16200, 16200
0...10...20...30...40...50...60...70...80...90...100 - done.
C:\Users\moto>
続けて,r.in.gdalもやってみよう。
r.in.gdal input=D:\shade_relief_geo\LC_SR_W_16200_W.tif output=NaturalEarthWH_map -l -o
実行結果は次のよう。
C:\Users\moto>r.in.gdal input=D:\shade_relief_geo\LC_SR_W_16200_W.tif output=NaturalEarthWH_map -l -o
x:
x:
Proceeding with import of 3 raster bands...
Importing raster map <NaturalEarthWH_map.red>...
100%
Importing raster map <NaturalEarthWH_map.green>...
100%
Importing raster map <NaturalEarthWH_map.blue>...
100%
C:\Users\moto>
で,Grass上で,座標値を確認した。問題ない。他のファイルも同様に実施した。全世界図は東西半球に区分されている。
r.in.gdal input=D:\shade_relief\LC_SR_W_16200_W.tif output=NaturalEarthWH_map -l -o
r.in.gdal input=D:\shade_relief\LC_SR_W_16200_E.tif output=NaturalEarthEH_map -l -o
r.in.gdal input=D:\shade_relief\HY_16200_W.tif output=NaturalEarthWaterWH_map -l -o
r.in.gdal input=D:\shade_relief\HY_16200_E.tif output=NaturalEarthWaterEH_map -l -o
r.in.gdal input=D:\shade_relief\MU_16200_W.tif output=NaturalEarthMODISurbanWH_map -l -o
r.in.gdal input=D:\shade_relief\MU_16200_E.tif output=NaturalEarthMODISurbanEH_map -l -o
なお,ぼくのWindows10の環境では,macでテキストをcommand+cでコピーして,Grassのコマンドプロンプトに入って,command+vでペーストができる。そして,何とGrassのコマンド出力もcommand+cでコピー,command+vでペーストで簡単にできる。
RGB画像を取り込むと, r,g,bの3ファイルに分割されるので,一つの画像に合成する必要がある。
http://motochan.sakura.ne.jp/public_html/GISContents/52.htm
に説明している。
r.composite red=MapIbaraki25000.red@PERMANENT green=MapIbaraki25000.green@PERMANENT blue=MapIbaraki25000.blue@PERMANENT levels=32 output=MapIbaraki25000rgb --overwrites
r.compositeコマンドの役割は次を参照してください。
https://grass.osgeo.org/grass76/manuals/r.composite.html
r.compositeコマンドのオプションにとして,上の例では,levels=32としている。levelsの使い方には次の規程がある。
levels=integer
Number of levels to be used for each component
Options: 1-256
Default: 32
levels=32にすると,32768 possible colors(15 bit per pixel)となり,識別能力からすると十分である。default値なので追加する必要もない。
GUIで実行する。
ラスター(R)/カラー調整/RGB作成[r.composite]を選ぶと,r.compositeのパネルが現れる。
必須パネルでは,RGBに対応するラスターマップを選択する。
出力するラスターマップ名を入力する。
NaturalEarthWH_map
レベルパネルでは,デフォルトの32のまま。
で,合成されたのであるが,解像度がかなり粗い。誤ってGeotiff化しなかった場合も同様だった。
一応,levels=256を実施したり,ditheringしたりしたが意味なかった。コマンドモードでも同じ結果であった。
その解決法を次に示す。
前もって,下記のようにresolutionと領域を設定する必要がある。試行錯誤も併せて示す。
https://grass.osgeo.org/grass77/manuals/g.region.html
g.region -p rast=<your landsat raster> res=30
ここでは,元画像の解像度は150dpiだから,-pは設定値が表示される。
g.region -p rast=NaturalEarthWH_map.red@worldmap res=150
C:\Users\moto>g.region -p rast=NaturalEarthWH_map.red@worldmap res=150
projection: 3 (ワx-ox)
zone: 0
datum: wgs84
ellipsoid: wgs84
north: 90N
south: 89:59:40S
west: 180W
east: 0:00:20W
nsres: 179:59:40
ewres: 179:59:40
rows: 1
cols: 1
cells: 1
C:\Users\moto>
ひえ〜。resはセル数なのか?
g.region -p rast=NaturalEarthWH_map.red@worldmap res=16200
おかしいなあ。
g.region -p rast=NaturalEarthWH_map.red@worldmap res=1
を実行後に,r.compositeを実行したが,
projection: 3 (ワx-ox)
zone: 0
datum: wgs84
ellipsoid: wgs84
north: 90N
south: 89:59:40S
west: 180W
east: 0:00:20W
nsres: 0:59:59.888889
ewres: 0:59:59.888889
rows: 180
cols: 180
cells: 32400
となっている。ということは,res=180/16200 = 0.011111111なのか。
つぎのように実行。
g.region -p rast=NaturalEarthWH_map.red@worldmap res=0.011111111
C:\Users\moto>g.region -p rast=NaturalEarthWH_map.red@worldmap res=0.011111111
projection: 3 (ワx-ox)
zone: 0
datum: wgs84
ellipsoid: wgs84
north: 90N
south: 89:59:40S
west: 180W
east: 0:00:20W
nsres: 0:00:39.998765
ewres: 0:00:39.998765
rows: 16200
cols: 16200
cells: 262440000
C:\Users\moto>
でけたあ。で,r.composite
r.composite red=NaturalEarthWH_map.red@worldmap green=NaturalEarthWH_map.green@worldmap blue=NaturalEarthWH_map.blue@worldmap levels=32 output=NaturalEarthWH_map5 --overwrite
一応, 東半球の計算過程を次にまとめる。
ステップ1:gdal_translate -of GTiff "D:\shade_relief\LC_SR_W_16200_E.tif" "D:\shade_relief_geo\LC_SR_W_16200_E.tif"
ステップ2:r.in.gdal input=D:\shade_relief_geo\LC_SR_W_16200_W.tif output=NaturalEarthWH_map -l -o
ステップ3:g.region -p rast=CleanTOPO2map@worldmap res=0.011111111
ステップ4:r.composite red=NaturalEarthEH_map.red@worldmap green=NaturalEarthEH_map.green@worldmap blue=NaturalEarthEH_map.blue@worldmap levels=32 output=NaturalEarthEH_map --overwrite
https://grass.osgeo.org/grass70/manuals/r.patch.html
input=name[,name,...] [required]
Name of raster maps to be patched together
output=name [required]
Name for resultant raster map
r.patch input=NaturalEarthWH_map,NaturalEarthEH_map output=NaturalEarth --overwrite
次の地図は, 上記の西半球だけでなくて,東半球を実行し,r.patch 合成したものである。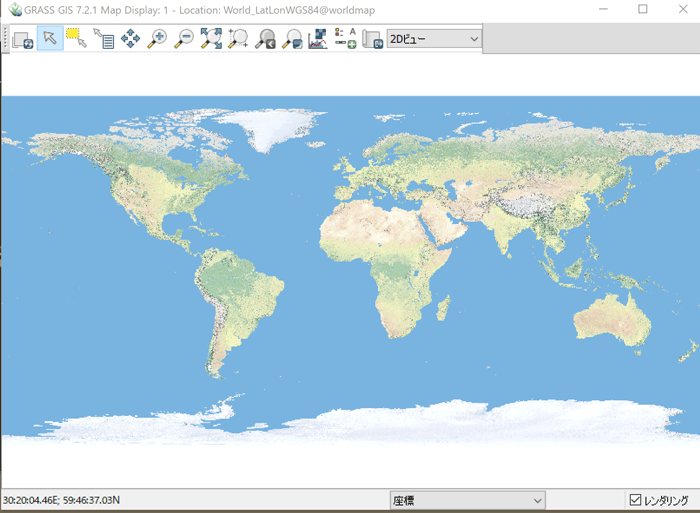
Water bodies:Western hemisphere (262.5MB)
D:\shade_relief\HY_16200_W.tif
Water bodies:Eastern hemisphere (262.5MB)
D:\shade_relief\HY_16200_E.tif
両ファイルを次のように実行する。
gdal_translate -of GTiff "D:\shade_relief\HY_16200_W.tif" "D:\shade_relief_geo\HY_16200_W.tif"
gdal_translate -of GTiff "D:\shade_relief\HY_16200_E.tif" "D:\shade_relief_geo\HY_16200_E.tif"
r.in.gdal input=D:\shade_relief_geo\HY_16200_W.tif output=NaturalEarth_waterWH_map -l -o
r.in.gdal input=D:\shade_relief_geo\HY_16200_E.tif output=NaturalEarth_waterEH_map -l -o
さて,Grassに取り込んでも,rgbの3ファイルはできない。gray scaleだからである。さらにこの使用目的からするとr.patchも不要である。
次の図のように, 陸域が黒になっている。海域は白っぽい。どのように,Natural Worldの画像に重ねれば良いのか。
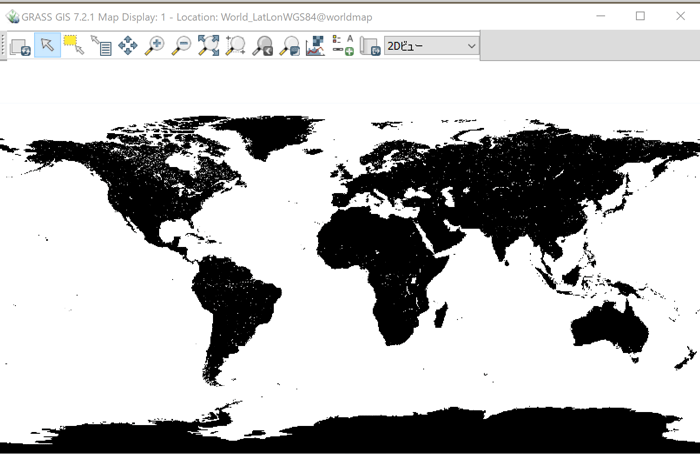
このrasterのピクセル情報は,
黒: color 000:000:000 value 0
白: color 255:255:255 value 255
で,水域が白くなっている。このrasterを上に,Natural Worldのrasterを下に置いて,r.patch(-zオプション)すると,陸域だけが浮かび上がることになる。
https://grass.osgeo.org/grass70/manuals/r.patch.html
を見ると,
r.patch -z input=name1,name2,... output=name
-z
Use zero (0) for transparency instead of NULL
だから,
r.patch -z input=NaturalEarth_waterWH_map,NaturalEarth_waterEH_map,NaturalEarth output=NaturalEarth+Water
とすれば,両半球で実施可能と考えたが,なぜか,西半球のみに限定された。2ファイルの透過処理ができないようだ。それで,この上に,東半球のみで処理。
r.patch -z input=NaturalEarth_waterEH_map,NaturalEarth+Water output=NaturalEarth+Water2
結局,waterというファイルは,湖岸線と海岸線を明示するものであることがわかった。
できたものを次に。ハドソン湾東のラブラドル半島付近
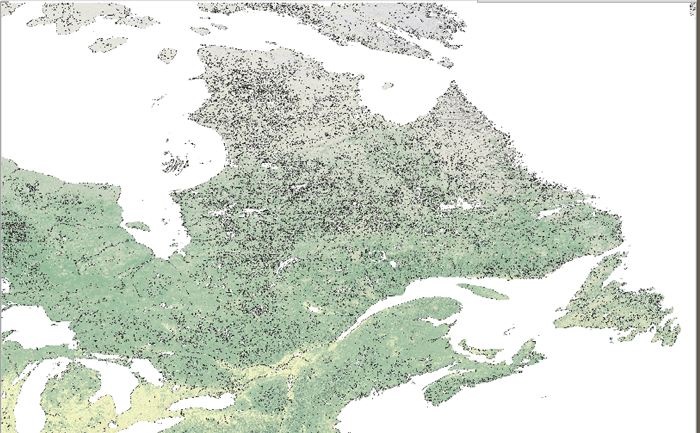
綺麗ではない。河道などがはっきりと見えるということはある。 waterのファイルは,水域というより汀を示したものである。
MODIS urban (more suburbs):Western hemisphere (262.5MB)
D:\shade_relief\MU_16200_W.tif
MODIS urban (more suburbs):Eastern hemisphere (262.5MB)
D:\shade_relief\MU_16200_E.tif
を実行。
gdal_translate -of GTiff "D:\shade_relief\MU_16200_W.tif" "D:\shade_relief_geo\MU_16200_W.tif"
gdal_translate -of GTiff "D:\shade_relief\MU_16200_E.tif" "D:\shade_relief_geo\MU_16200_E.tif"
r.in.gdal input=D:\shade_relief_geo\MU_16200_W.tif output=NaturalEarth_urbanWH_map -l -o
r.in.gdal input=D:\shade_relief_geo\MU_16200_E.tif output=NaturalEarth_urbanEH_map -l -o
都市域のrasterを次に。
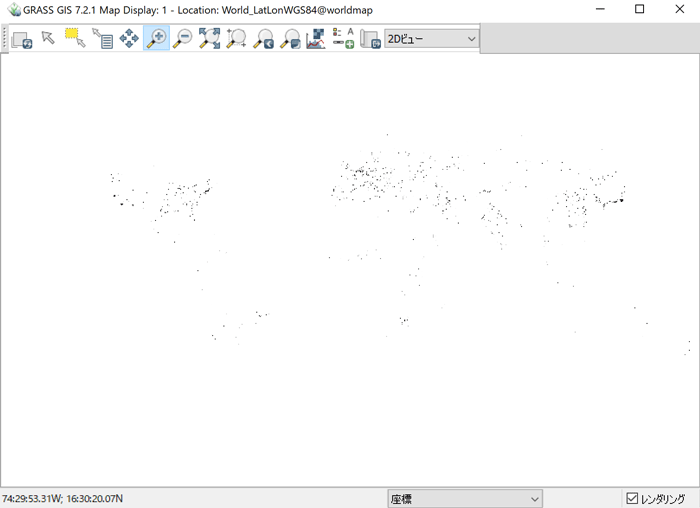
このrasterは,
黒: color 000:000:000 value 0
白: color 255:255:255 value 255
黒が都市部なんだけどなあ。だから,
r.patch -z input=NaturalEarth_urbanWH_map,NaturalEarth output=NaturalEarth+Urban
やっぱり,都市部の0値部分に,NaturalEarthの画像が覗いている。全くだめ。
Photoshopで白色部分のnullにすればいいと思ったが,座標が壊れた。再度geotiff化すればいいかもと思いつつ,面倒。
r.nullを使って成功した。
https://grass.osgeo.org/grass70/manuals/r.null.html
r.in.gdal input=D:\shade_relief_geo\MU_16200_W.tif output=NaturalEarth_urbanWH_map -l -o
r.in.gdal input=D:\shade_relief_geo\MU_16200_E.tif output=NaturalEarth_urbanEH_map -l -o
で,再度,取り込んだ後で,r.nullを使う。null=255ではなく,set nullにした。
r.null map=NaturalEarth_urbanWH_map setnull=255
r.null map=NaturalEarth_urbanEH_map setnull=255
GUIで,NaturalEarth_urbanWH_map, NaturalEarth_urbanEH_map両方について,Nullセルのタブで,背景色(NULLの)をredにした。redになっているということは元々のwhite部分がnullになっていることを意味する。つまり,穴になっているので,この図の下にNaturalEarthの図を配置して,r.patchすると都市部が黒色でマーク されることになる。
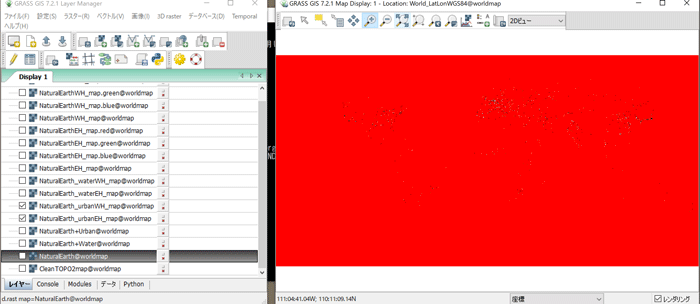
r.patch input=NaturalEarth_urbanWH_map,NaturalEarth output=NaturalEarth+Urban
r.patch input=NaturalEarth_urbanEH_map,NaturalEarth+Urban output=NaturalEarth+Urban2
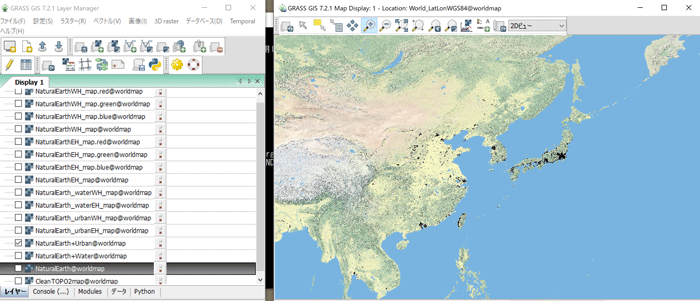
実行後,NaturalEarth+Urban2をNaturalEarth+Urbanに名称変更した。下の図は日本付近を拡大表示している。
II.5 nignejansk2_polygonを表示
さて,前にnignejansk2_polygonを作成したが,そのポリゴンを表示したが,図中のほぼ中央の黒い点がそれに当たる。世界地図を使った分布の研究にはこのポリゴンはあまりに小さかった。
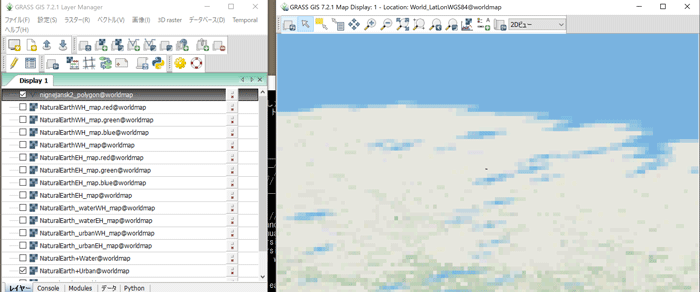
WorldMercatorやWGS84_PseudoMercator座標系に入って,
r.proj location=World_LatLonWGS84 mapset=worldmap input=NaturalEarth+Urban
を実行すると,
ERROR: 入力したラスターマップは現在の領域外です,などのエラーが出る。
raster地図の分割などが必要なのであろう。
ベクトルマップも下記のサイトに公開されている。いずれも世界経緯度座標系での提供である。
https://www.naturalearthdata.com/features/
以 上